Hey all,
Just dropping by to wipe off the cobwebs on the blog and make sure it hadn't shriveled up from being in the dark for so long. As I mentioned from the outset, I am the father of two wonderful little kids - a toddler and a three month old. As it goes, May has been an absolute whirlwind of pesky adult and life requirements that has pretty well wiped out my time to tell you all my, sniff, true feelings about gaming ::note sarcasm::.
Truthfully, it really has been a rough schedule in terms of any gaming. Besides missing Games Day, I've played some Netrunner with a friend one evening and a quick, anti-climatic scenario of Firestorm Armada. Unfortunately, both events I was either too tired or too distracted to record the proceedings for posterity.
In any case, thanks for those faithful who've been sticking with me. I have some news to share in the coming weeks which should be pretty exciting dealing with Battletech and X-Wing. First up will likely be Battletech, dealing with the Devil's Aces.
Stay classy.
May 24, 2016

May 5, 2016
AAR: Imperial Crackdown Scenario 3B
In belated honor of May the 4th be with you, let's dive back into X-Wing!
The Imperial Crackdown story has been a fun one to play, but now we've come to the final exchange between the brave Rebels and the defiant Imperial Navy. Last time we saw the Imperials shock the Rebels with a victory, severely damaging their wing leader and taking the complete victory.
After the Rebels fled and the crew of the Requiem interrogated the hopeless freighter crew, they now have the location of the Rebel base (no, it isn't on Dantooine...) and the time has come to crush the Rebel menace in this sector once and for all. Not wanting the trouble of transporting the freighter crew to a penal facility, the captain of the Requiem tells his Stormtroopers to "deal with the crew". Such is the way of life in the Outer Rim. Because of the location of the base, the Requiem will not be able to make it in time to deal with the base, but luckily another sister ship, the Suppressor, is close-by and is ready to engage the base.
For the Rebels, the situation couldn't be more dire. Barely able to patch the Ghost back together, Kanan knew that the Empire wouldn't miss the opportunity to crush them. Despite the base commander's confidence in the remote nature of the asteroid base, it would only be a matter of time. The only defense they had were a series of hidden shield generators on small asteroids surrounding the base. If those were destroyed, the Imperial Navy could just bombard the base with impunity without risking troops, but the generators were far too small for a Star Destroyer's heavy turbolasers to hit accurately. It would be a job for a precision fighter strike. That was where he and the remaining Rebel defenders would need to be.
Overview
Scenario 3B sees the Rebels given a 100 pt main force including the Wing Leader and a 60 pt Reinforcement squadron. They will need to stop an Imperial force lead by a Gozanti that can be completely upgraded for no cost and a 100 pt squadron to build from. The two will clash over 3 shield generators, hidden with 3 false ones, to see who wins the entire scenario.
Forces:
Rebels (Tioch)
Setup for the mission was fairly straight forward. As I said in the overview, six obstacle markers were placed on the board by me. Then six sensor echo tokens, randomly and blindly selected were applied to each obstacle. Then Drew got a turn moving at most three of them. After that, we deployed our ships. I decided to deploy near my right flank. Drew deployed in the middle, intent on following a nice lane of obstacles he created so his Gozanti could scan as effectively as possible. Considering the scenario is about the Rebels being desperately backed into the corner, it's looking bad for my Rebels.
Turn 1
Turn 1 was the beginning of each of our strategies. The Suppressor began slow, methodical movements down the obstacle lane while Drew's harassing Juno and Inquisitor drove right towards my Ghost. My plan? To get the Ghost in position for at least a few passing 5 Atk barrages at close range before bugging out. My TLT Y-wing would follow alongside, either to combine fire or hopefully ward off the adventurous Aces.
Unfortunately for me, Drew's placement of the Suppressor put him in range of a sensor echo on Turn 1 and, after scanning it, one of the three precious shield generators. With his first target found, the Suppressor deployed its two scanning ships. Considering he had me outnumbered 2:1, he could scan with impunity.
Shooting was a decidedly Imperial affair. Only able to use the DLT on the Suppressor, Drew reduced the first generator to 1 HP. As I said before, things were not looking good. Albeit that the first half of my objective was in question, I knew the Suppressor had to die if I had any hope of winning this game.
Turn 2
One turn down, one generator surely lost. The Rebels had to make something happen. Movement between each side was mostly setup again. We both were anticipating what Turn 3 would be considering another 60 pts of my group would finally arrive. Drew lined up his Inquisitor and Juno to chase down the Ghost. His two scanning ships, Wampa and Omega Leader, were sent on the case to the second sensor echo. The Suppressor continued its slow march of victory. One could almost hear the Imperial March in the background (if it weren't for the The Force Awakens soundtrack playing).
My Rebels kept to their guns. No sense in freaking out over one generator being found. There were still five echoes on the board - three of which were a significant distance from the Suppressor. Kanan and my Y-wing set up for their attack run and I quickly deployed Ezra hoping another player on the field might force the Imperials to divide their fire. Unfortunately for me, fate had other plans.
And just like that, any hope of my gaining a victory without a table wipe were dashed. Two turns, two discovered generators. For the Imperials, now it would just be a matter of killing my Ghost or finding the lone remaining generator.
Shooting went fairly poorly for me. I barely scratched the Suppressor with my first volley from the Ghost and the TLT was unable to snag a hit on the slippery Inquisitor. On top of that, Ezra couldn't hit either. The Imperials had better odds. While the Suppressor destroyed the first generator, the scanning ships laid into their quarry and damaged it. Also, Juno, the "You're gonna get hit no matter what" ace, and the Inquistor plinked away Kanan's shields.
Turn 3 - Can the base be saved?!
Turn 3 came and boy was I trouble. Two generators found, one destroyed, the Suppressor barely hurt, and I was finally in shotgun distance of Drew's big boy. All the while, I had two Aces on my backside taking bets on who would bag me first. At this point, my only hope is to get out of turn 3 alive and relatively unscathed so my reinforcements could hopefully swing the battle back in my favor.
Movement was an interesting affair. Juno and the Inquisitor stayed on Kanan while the scanning ships were forced to break ranks to try and cover more ground. The Suppressor decided it was tired of getting beat up by that Rebel bully and did his best impression of Ralphie from the Christmas Story, turning in on the Ghost.
My Rebels slowed to attempt to get a good salvo off so the A-Wings could finish the job. Kanan and the Y-wing kept their approach vector, but it was Ezra who had the surprise of the turn!
My maneuver for Ezra landed him squarely on the tail of the Inquisitor. What luck! My ace in the hole was in place yet again. Now if I could only land it...
Which never happened... Shooting was a slugging match. I finally hurt the Suppressor like I should have, dropping its shields and putting a good amount of hurt into it. Unfortunately, Ezra shot and despite a solid showing (2 hits & a crit I believe), the token-happy Inquisitor evaded it with little trouble. The Imperial's response was brutal. Anyone who had a shot, shot the Ghost. I lost shields and I took a good number of hits. Also, the Suppressor jammed the Ghost, limiting my options (and Kanan's ability).
So I survived, and now my spirits were lifted...
The "Raging Greenies" had arrived.
Turn 4 - Where it all went wrong...
If turn 3 was a shooting fest, turn 4 would become an absolute bloodbath. At this point, I had to keep the Ghost alive. Why? Because I forgot to mention that the Suppressor finished off the second generator last turn as well. I lose the Ghost, I lose it all. My only option? Run like hell. A hard thing for such a big ship. I did have the A-wings though, and I had hoped their arrival would force Drew to shift tactics.
It didn't...
Despite running my Ghost at full speed and bring my Y-wing and Ezra in for some cover, the Imperials descended on me. Drew kept his scanners off working as well, knowing that the further they were away, the harder my job was as well. My A-Wings drove hard and fast for the Suppressor though. My plan was to have them Rage at Range 1 and then between an opening green maneuver on turn 5 and their combined wingmans, I'd shed all their stress to do it again.
Shooting was where it would be decided though. Unfortunately, the combined damage from Juno and the Inquisitor was unavoidable and...
Boom! I just couldn't keep the damage from accruing. With my wing leader gone, we decided the match had been a little less than climatic for our tastes and played our the rest of the shooting. My TLT Y-Wing (who's only shot was the big guy), Ezra, and the A-wings absolutely hammered the Suppressor.
Again, the Gozanti falls victim to the combined Rebel guns. Now with both of the starring roles in this space opera dead, it would fall to their supporting actors to decide the battle. Following the Suppressor's destruction, Drew and I decide to play a few more rounds to see if I could table-wipe or he could find the last generator.
Epilogue Turns 5, 6, & 7
Well, on Turn 4, while the big guys were making a jolly-good fireworks presentation, Drew's scanners found a third echo, which turned out to be a dud. On turn 5, we circled into a true dogfight with Drew's Aces tangling with my Y-wing and Ezra (who was emo-crying over the supposed death of Kanan at this point) and my A-wings raced to get the scanners. Blows were traded, but nothing was removed and the scanners found a fourth echo - another dud. WHERE WERE YOU THREE TURNS AGO!!!!
On turn 6, the whole dogfight shifted to my side of the table, racing towards the two echoes closest to my edge. Drew, suffice with his ability to dodge my attacks, basically sent his ships to bracket the remaining echoes. I finally had my survivors in a position to encircle them and limit their movement. Importantly though, no one was in range to scan...
Turn 7 was the decider. Drew contended he couldn't see him winning unless this turn went in his favor. Committing to find the last generator had put him facing the wrong way as my survivors barreled into him. Unfortunately for me, his scanners found the last generator. With little I could do to stop it from being destroyed, I conceded. A pyrrhic, but overall victory for the Imperials!
Final Mission Thoughts
As a whole, Drew and I agreed that the Imperial Crackdown campaign was a pretty good. The plot of it along with structure of the 1st and 2nd scenario were pretty well put together. Unfortunately, we both concluded that this campaign was nothing compared to the "Will of the Empire" campaign from the Imperial Raider expansion, which was good from the start to the finish.
Where Imperial Crackdown fell apart for me was the third scenario. First off, I'm not sure why they decided to make the campaign on three missions long. Except for the GR-75, all the other epic ships thus far have come with a 4 mission campaign which turned out to be pretty fulfilling. Unless they were aiming for symmetry (points for that), there really wasn't any necessity with the story they were telling to not go 4 missions.
On top of that, the 3b scenario we played was an absolute mess. The Rebels intro objective is almost impossible to attain. Sure, we had two generators found in rapid succession, but the Rebels are tasked with chasing down at minimum 2 TIEs and killing the Gozanti, two drastically asymmetrical targets before the Imperials destroy 2 targets. When you factor in the fact that an Imperial player could very easily job the scenario by taking 4 TIEs docked (which would all be scanner ships) and then send the Rebels on a wild goose hunt trying nail down them before 2 generators are destroyed, its impossible for the Aces to win without a table-wipe.
On the flipside, the Imperial objective is much more straight forward. Arguably, our choice of Wing Leader was a pretty easy target to hit with massed firepower, but short of a Fat Han or Super Dash, the Imperials have two fairly even targets to hit to win the "kill 2 gen's and Wing Leader" objective and if they maximized their scanners, the 3 destroyed generators would EASILY be attained. On top of that, the Imperial player has free reign to min-max the hell out of the Gozanti because its upgrades are free. Don't get my wrong, I like asymmetrical scenarios, but this one is just not very well structured.
Now from my review of the 3A scenario, I think it would be a much better scenario, but it's fairly difficult to get to the 3A scenario based on the fact that they second scenario isn't actually that easy to win for the Rebels either. Regardless, I still stand by what I said. It's a good campaign, but the 3B scenario is a letdown to an overall enjoyable experience.
Now let's hope a return of the Heroes of Aturi Cluster campaign can be had. Also, I am in the process of working on a revision of my original homebrewed Crusader-class Scum big ship. I hope to share that in the near future!
Until then, you're all clear kid, now let's blow this thing and go home!
The Imperial Crackdown story has been a fun one to play, but now we've come to the final exchange between the brave Rebels and the defiant Imperial Navy. Last time we saw the Imperials shock the Rebels with a victory, severely damaging their wing leader and taking the complete victory.
After the Rebels fled and the crew of the Requiem interrogated the hopeless freighter crew, they now have the location of the Rebel base (no, it isn't on Dantooine...) and the time has come to crush the Rebel menace in this sector once and for all. Not wanting the trouble of transporting the freighter crew to a penal facility, the captain of the Requiem tells his Stormtroopers to "deal with the crew". Such is the way of life in the Outer Rim. Because of the location of the base, the Requiem will not be able to make it in time to deal with the base, but luckily another sister ship, the Suppressor, is close-by and is ready to engage the base.
For the Rebels, the situation couldn't be more dire. Barely able to patch the Ghost back together, Kanan knew that the Empire wouldn't miss the opportunity to crush them. Despite the base commander's confidence in the remote nature of the asteroid base, it would only be a matter of time. The only defense they had were a series of hidden shield generators on small asteroids surrounding the base. If those were destroyed, the Imperial Navy could just bombard the base with impunity without risking troops, but the generators were far too small for a Star Destroyer's heavy turbolasers to hit accurately. It would be a job for a precision fighter strike. That was where he and the remaining Rebel defenders would need to be.
Overview
Scenario 3B sees the Rebels given a 100 pt main force including the Wing Leader and a 60 pt Reinforcement squadron. They will need to stop an Imperial force lead by a Gozanti that can be completely upgraded for no cost and a 100 pt squadron to build from. The two will clash over 3 shield generators, hidden with 3 false ones, to see who wins the entire scenario.
Forces:
Rebels (Tioch)
- Main Force (100 pts)
- "Kanan Jarrus" VCX-100 w/ "Ghost", "Chopper", Recon Spec., Ion Turret, & Adv. Sensors (Wing Leader)
- "Ezra Bridger" Attack Shuttle w/ PTL, Engine Upgrade, & "Phantom"
- Gold Sqd Pilot Y-Wing w/ TLT
- Reinforcements (60 pts) - "The Raging Greenies"
- Green Sqd Pilot A-Wing w/ "Test Pilot", Chardaan Refit, Wingman, & Rage
- Green Sqd Pilot A-Wing w/ "Test Pilot", Chardaan Refit, Wingman, & Rage
- Green Sqd Pilot A-Wing w/ "Test Pilot", Chardaan Refit, Wingman, & Rage
- Gozanti-class w/ Docking Clamps, DLT, Broadcast Array, Weapons Team, Automated Protocos, Palpatine, & Suppressor title.
- "The Inquisitor" TIE Adv. Proto. w/ PTL, "x1" title, AT
- "Juno Eclipse" TIE Adv. w/ "v1" title & Adv. Targeting Comp.
- "Omega Leader" TIE/FO w/ Juke & Comms Relay
- "Wampa" TIE/LN
- Rebels - The Rebels must destroy the Gozanti and any "scanner" ship before 2 shield generators have been destroyed OR a table wipe of the Imperial forces
- Imperials - Destroy 2 shield generators and the Wing Leader OR Destroy 3 shield generators
- Tioch - So after reading the objectives for this mission a few times, it really set in that I had a mountain to climb in front me. The last two scenarios taught both Drew and I just how to kill the Gozanti, but it was a crap-shoot as to what would be docked. Not to mention, I would have to do that before they found 2 shield generators.
I know I need to get the Gozanti out of the way as quickly as possible though, so I'd need to take Kanan, Ezra, & my TLT Y-wing straight for it. Hopefully Drew's force would all be docked, so I could get to it without much trouble. Still, the TLT Y and Ezra would be my best shot for defending the Ghost till Turn 3.
The crucial group is my reinforcement squadron. I debated either using a pair of Daggers w/ FCS and Manglers or my 3 A-Wings. The versatility of the massed firepower and the ability to possibly chase down the TIE's won out. If the Gozanti was still in good standing, I'd send them against it.
Regardless, I had little faith that I wouldn't end up needing a table wipe. Still, I have to try.
- Drew - Use the Gozanti to build a mega version of the "Imperial Aces & Palp Shuttle" list. Usually this list is 2-3 Imperial Aces such as Soontir, Vader, Omega, Phantom, etc; plus a Lambda Shuttle with Emperor Palpatine aboard.
In this case, I was able to load Palpatine onto the Gozanti along with a potent turret and ability to Jam. Then since I still had 100 pts to play with, I refined my personal ImpAces list (Juno,Inquisitor,Omega,&Wampa). The 2 TIEs were able to be loaded on the Gozanti and gain the Scanner action.
Strategy was to use Juno & Inquisitor as hard hitting (i.e. annoying) dogfighters while the other 2 skirt the edges and find the Transmitters. Unlike the last time I ran the Gozanti, I wouldn't over-commit this time with fast maneuvers. I decided to move slowly and conserve energy for shield boosting.
 |
| The action started faster than I could get a setup image! |
Turn 1
 |
| Target the Suppressor! |
Unfortunately for me, Drew's placement of the Suppressor put him in range of a sensor echo on Turn 1 and, after scanning it, one of the three precious shield generators. With his first target found, the Suppressor deployed its two scanning ships. Considering he had me outnumbered 2:1, he could scan with impunity.
 |
| Go my minions!! |
Turn 2
 |
| The plans begin to unfold... |
My Rebels kept to their guns. No sense in freaking out over one generator being found. There were still five echoes on the board - three of which were a significant distance from the Suppressor. Kanan and my Y-wing set up for their attack run and I quickly deployed Ezra hoping another player on the field might force the Imperials to divide their fire. Unfortunately for me, fate had other plans.
 |
| Second generator sighted Commander! |
Shooting went fairly poorly for me. I barely scratched the Suppressor with my first volley from the Ghost and the TLT was unable to snag a hit on the slippery Inquisitor. On top of that, Ezra couldn't hit either. The Imperials had better odds. While the Suppressor destroyed the first generator, the scanning ships laid into their quarry and damaged it. Also, Juno, the "You're gonna get hit no matter what" ace, and the Inquistor plinked away Kanan's shields.
Turn 3 - Can the base be saved?!
 |
| We've danced this tango before my friend... |
Movement was an interesting affair. Juno and the Inquisitor stayed on Kanan while the scanning ships were forced to break ranks to try and cover more ground. The Suppressor decided it was tired of getting beat up by that Rebel bully and did his best impression of Ralphie from the Christmas Story, turning in on the Ghost.
My Rebels slowed to attempt to get a good salvo off so the A-Wings could finish the job. Kanan and the Y-wing kept their approach vector, but it was Ezra who had the surprise of the turn!
 |
| Well well well... |
Which never happened... Shooting was a slugging match. I finally hurt the Suppressor like I should have, dropping its shields and putting a good amount of hurt into it. Unfortunately, Ezra shot and despite a solid showing (2 hits & a crit I believe), the token-happy Inquisitor evaded it with little trouble. The Imperial's response was brutal. Anyone who had a shot, shot the Ghost. I lost shields and I took a good number of hits. Also, the Suppressor jammed the Ghost, limiting my options (and Kanan's ability).
So I survived, and now my spirits were lifted...
 |
| Clear my sky gentleman... |
Turn 4 - Where it all went wrong...
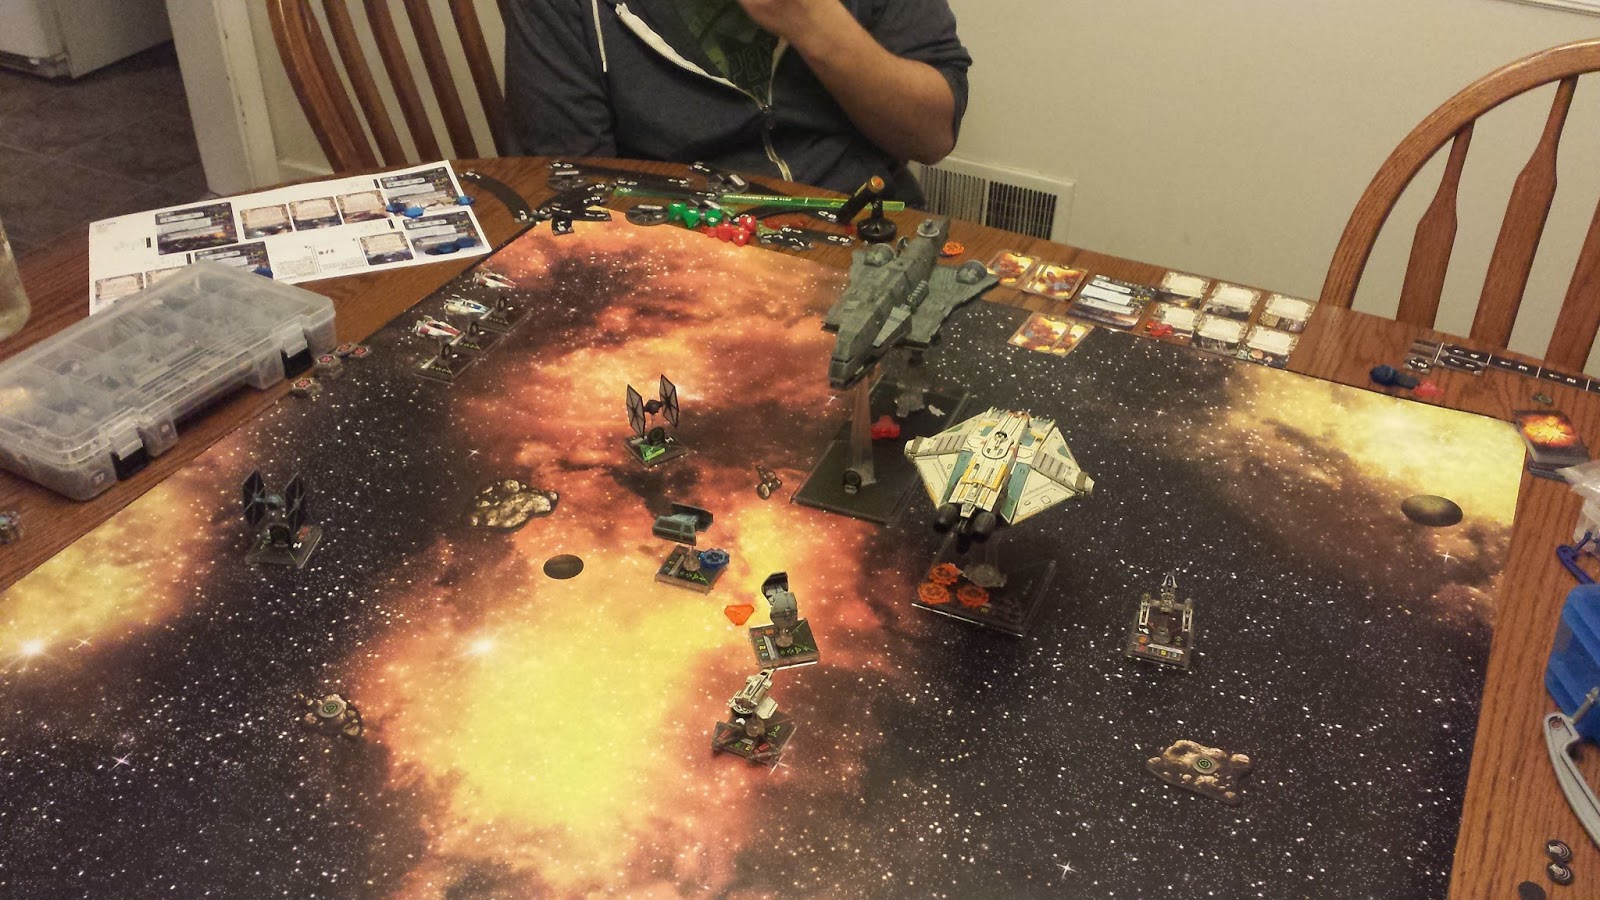 |
| Did they arrive in time?! |
It didn't...
Despite running my Ghost at full speed and bring my Y-wing and Ezra in for some cover, the Imperials descended on me. Drew kept his scanners off working as well, knowing that the further they were away, the harder my job was as well. My A-Wings drove hard and fast for the Suppressor though. My plan was to have them Rage at Range 1 and then between an opening green maneuver on turn 5 and their combined wingmans, I'd shed all their stress to do it again.
Shooting was where it would be decided though. Unfortunately, the combined damage from Juno and the Inquisitor was unavoidable and...
 |
| Imperial Victory... |
 |
| Or was it? |
Epilogue Turns 5, 6, & 7
Well, on Turn 4, while the big guys were making a jolly-good fireworks presentation, Drew's scanners found a third echo, which turned out to be a dud. On turn 5, we circled into a true dogfight with Drew's Aces tangling with my Y-wing and Ezra (who was emo-crying over the supposed death of Kanan at this point) and my A-wings raced to get the scanners. Blows were traded, but nothing was removed and the scanners found a fourth echo - another dud. WHERE WERE YOU THREE TURNS AGO!!!!
On turn 6, the whole dogfight shifted to my side of the table, racing towards the two echoes closest to my edge. Drew, suffice with his ability to dodge my attacks, basically sent his ships to bracket the remaining echoes. I finally had my survivors in a position to encircle them and limit their movement. Importantly though, no one was in range to scan...
Turn 7 was the decider. Drew contended he couldn't see him winning unless this turn went in his favor. Committing to find the last generator had put him facing the wrong way as my survivors barreled into him. Unfortunately for me, his scanners found the last generator. With little I could do to stop it from being destroyed, I conceded. A pyrrhic, but overall victory for the Imperials!
Final Mission Thoughts
- Drew (Imperials) - Using 2 TIEs to skirt the edge was successful, but the Gozanti with Palpatine wasn't as useful as I was hoping. Palp has a great ability, but I ended up saving it for the Gozanti itself to use, instead of my Aces. Against low agility ships like the Ghost, ImpAces were brutal and I was able to lay down a lot of damage quickly.
Once the Ghost was eliminated and we opted to continue the scenario, I had 2 Transmitter Tokens left. Due to the current placement, i was able to converge 3 fighters on one of those tokens with the 50/50 shot that it would be the final Transmitter. Luck was literally on my side and I was able to destroy the transmitter with my higher PS Aces before the wave of A-wings closed on them. If that transmitter token had been blank, the next round would have seen a major bloodbath as all 9 fighters converged. - Tioch (Rebels) - To quote Mal Reynolds, "They don't like it when you shoot at them. I figured that out myself".
Oooph! What a beating. Not only did I misjudge a very critical part of the Imperial's objectives, but the dice gods decided I should roll terribly as well. Yes, I got the Gozanti (and the Emperor, TIME PARADOX?!), but in the process I just got manhandled by the Aces with little or nothing I could respond with. I definitely wasn't helped by Drew pushing me to a table-wipe victory in turn 2. I had hoped that the search for the generators would have gone longer because it might have forced Drew to divide his groups. The turn 3 arrival of my A-Wings was really too-little-too-late when I think about it. Yes, I plowed through the Gozanti with surprising ease that turn, but I still had 4 other ships to deal with, all of which were pretty much nigh-impossible to nail down. The fact that so many elements proved useless (Ezra, the TLT, Kanan's ability) was the nail in my coffin.
As a whole, Drew and I agreed that the Imperial Crackdown campaign was a pretty good. The plot of it along with structure of the 1st and 2nd scenario were pretty well put together. Unfortunately, we both concluded that this campaign was nothing compared to the "Will of the Empire" campaign from the Imperial Raider expansion, which was good from the start to the finish.
Where Imperial Crackdown fell apart for me was the third scenario. First off, I'm not sure why they decided to make the campaign on three missions long. Except for the GR-75, all the other epic ships thus far have come with a 4 mission campaign which turned out to be pretty fulfilling. Unless they were aiming for symmetry (points for that), there really wasn't any necessity with the story they were telling to not go 4 missions.
On top of that, the 3b scenario we played was an absolute mess. The Rebels intro objective is almost impossible to attain. Sure, we had two generators found in rapid succession, but the Rebels are tasked with chasing down at minimum 2 TIEs and killing the Gozanti, two drastically asymmetrical targets before the Imperials destroy 2 targets. When you factor in the fact that an Imperial player could very easily job the scenario by taking 4 TIEs docked (which would all be scanner ships) and then send the Rebels on a wild goose hunt trying nail down them before 2 generators are destroyed, its impossible for the Aces to win without a table-wipe.
On the flipside, the Imperial objective is much more straight forward. Arguably, our choice of Wing Leader was a pretty easy target to hit with massed firepower, but short of a Fat Han or Super Dash, the Imperials have two fairly even targets to hit to win the "kill 2 gen's and Wing Leader" objective and if they maximized their scanners, the 3 destroyed generators would EASILY be attained. On top of that, the Imperial player has free reign to min-max the hell out of the Gozanti because its upgrades are free. Don't get my wrong, I like asymmetrical scenarios, but this one is just not very well structured.
Now from my review of the 3A scenario, I think it would be a much better scenario, but it's fairly difficult to get to the 3A scenario based on the fact that they second scenario isn't actually that easy to win for the Rebels either. Regardless, I still stand by what I said. It's a good campaign, but the 3B scenario is a letdown to an overall enjoyable experience.
Now let's hope a return of the Heroes of Aturi Cluster campaign can be had. Also, I am in the process of working on a revision of my original homebrewed Crusader-class Scum big ship. I hope to share that in the near future!
Until then, you're all clear kid, now let's blow this thing and go home!
April 19, 2016
Trailer Breakdown & Reaction: Rogue One - A Star Wars Story Part 2
Welcome back! (maybe I should say that to myself... Real life got in the way last week)
I decided I'd approach the Rogue One in two parts simply because the trailer itself is really broken into two parts - an exposition introducing Jyn narrated by Mon Mothma and a slam-bam montage narrated by Forest Whitaker's character. We covered the exposition in the first part which can pretty much be summed up like this:
Then you have the originals, where everything looks pretty basic, kinda mundane, and even pretty dirty. I'm not sure if this is more an appreciation for the brilliance of the set design in the originals or an apologetic argument for the CG in the prequels, but the original trilogy's set design really had you feeling like you were in a time where "new and flashy" was a premium most couldn't afford in a galaxy both recovering from a galactic war and dealing with an active uprising. Even from the trailer for Rogue One, you can tell this has been upheld and it's a major plus. Rogue One has to look like it fits in. Like Felicity Jones could walk by a young Carrie Fisher in some "Back to the Future"-esque scene.
Regardless, then we come to the crux of the trailer. Mon Mothma's briefing gives way to Forest Whitaker's grizzled speech. Good point to make here is the difference between these two characters. Mon Mothma is clothed in white, clean, adorned clothing which personify respect and authority. Forest Whitaker's character is crippled and wearing what looks to be half-functioning armor with a breathing mask. I almost wonder if his character was someone that the Rebels may have used in the past, failed at his task (whether by the Imperial juggernaut of some selfish consequence), and was discarded by the Rebels. It would make sense for his speech, which I assume is to Jyn Erso.
As we get this cryptic speech, we get a great series of snapshots from the movie. First we see...
A collection of Rebel pilots being captured.
Jyn and Poe's daddy, plus an unnamed droid running from the equivalent "A Hard Days Night crowd" group of stormtroopers.
And finally a "Butch Cassidy and the Sundance Kid" like run for freedom by the protagonists at the end of the trailer, which I'm sure doesn't go well for them. That being said, four Imperial walkers (the design isn't too bad to be a "prototype AT-AT") is one hell of response to a Oceans-Eleven-team of Rebels.
Interspersed through these scenes, there were a few other interesting catches I saw. First would be the homage to the Hoth Trooper uniform from Empire Strikes Back.
 A second Abrams lens-flare in one trailer!

Elements of the First Order shuttle design before there was a Kylo Ren.
The appearance of who I ultimately think will be a tragic character in the story. Initially, I thought that he would be some kind of scary Imperial Inquisitor/Rebel Hunter, but then I remembered he is apparently part of the team. I imagine he will be some kind of Echani-style fighter who will rather fight then be captured by the Imperial troops.
Finally we get to the last couple interesting visual notes from the trailer - the Stormtroopers. Aside from your standard Stormtroopers who could be straight from a local 501st fan legion, you have some new types show up in trailer. Fans of the Imperial Assault board game should be pleased. First, there's the Imperial Tank trooper you catch a momentary glimpse of here:
While that's an interesting variation, let's get to the big scary ones...
The minute I saw these guys I began hoping beyond all hope that we'd seen an on-screen version of the venerated Dark Trooper. I doubt that this is the case, but they could be a kind of Shadow Trooper (another reference to the Dark Forces series) or essentially some kind of counter-terrorism, wet-work, black ops Stormtrooper specialist. Still, they look fantastic.
Overall, I really liked this trailer and even after a couple weeks since it was revealed, I still find it very exciting. I feel like Rogue One has the possibility of becoming one massive hype-train though and could suffer from the both attempting to live up to "The Force Awakens" and also having a sufficient epic feeling meant to be told in one movie.
Rogue One has a very dubious distinction of being the first major Star Wars story that isn't considered an "episode #" in the Star Wars movie lexicon. It has to be a stand alone story without the benefit of another two movies to tell it's story. Honestly, I think this could be its biggest challenge.
Let me explain it this way. If you look back all of the Star Wars films, I contend that A New Hope is the only Star Wars film that can really be viewed alone without any of the other movies. Empire may be the best story in terms of acting/defining moments, but it is also the middle child in terms of the trilogy and really needs both A New Hope and Jedi to tell the complete story (as Empire really lacks the necessary character introductions). If you only viewed one Star Wars film, A New Hope really stands on its own without the rest of the saga.
Rogue One has to be a singular story and that may be a difficult accomplishment considering all of the other movies were written from the standpoint of either building on previous movies that built the universe or being able to tell a story that can be finished in another movie. Sure, Rogue One will tie into A New Hope, but unless they pull in other major connecting characters besides Mon Mothma, it can afford to be sufficiently detached from the main story. Rogue One can exist on its own SWU island, and I personally think it should.
So what do you think? Leave your comments below. Hope you liked the breakdown and reaction. I'd love to do more (perhaps a bit more brief in the future). Later sithspawn!
You can find part one of my breakdown here: Rogue One: Breakdown and Reaction pt 1
Please note, all images are screenshots from the Rogue One trailer found on Star Wars Official Youtube channel located here: https://www.youtube.com/user/starwars. Dropship Inbound is a non-profit blog and all images are protected under Fair Use. All rights reserved for the images of the trailer are Lucasfilm and Lucasfilm-affliates.
I decided I'd approach the Rogue One in two parts simply because the trailer itself is really broken into two parts - an exposition introducing Jyn narrated by Mon Mothma and a slam-bam montage narrated by Forest Whitaker's character. We covered the exposition in the first part which can pretty much be summed up like this:
- Jyn Erso has been on the wrong-side of the law for a long time
- The Rebels need someone to get the plans for the Death Star
- The Rebels need someone who doesn't love the Empire and is willing to go the extra mile
- Jyn Erso likes to "rebel"
Then you have the originals, where everything looks pretty basic, kinda mundane, and even pretty dirty. I'm not sure if this is more an appreciation for the brilliance of the set design in the originals or an apologetic argument for the CG in the prequels, but the original trilogy's set design really had you feeling like you were in a time where "new and flashy" was a premium most couldn't afford in a galaxy both recovering from a galactic war and dealing with an active uprising. Even from the trailer for Rogue One, you can tell this has been upheld and it's a major plus. Rogue One has to look like it fits in. Like Felicity Jones could walk by a young Carrie Fisher in some "Back to the Future"-esque scene.
Regardless, then we come to the crux of the trailer. Mon Mothma's briefing gives way to Forest Whitaker's grizzled speech. Good point to make here is the difference between these two characters. Mon Mothma is clothed in white, clean, adorned clothing which personify respect and authority. Forest Whitaker's character is crippled and wearing what looks to be half-functioning armor with a breathing mask. I almost wonder if his character was someone that the Rebels may have used in the past, failed at his task (whether by the Imperial juggernaut of some selfish consequence), and was discarded by the Rebels. It would make sense for his speech, which I assume is to Jyn Erso.
As we get this cryptic speech, we get a great series of snapshots from the movie. First we see...
 |
| Bad boys, bad boys... |
 |
| Insert Beatles guitar riff... |
 |
| There be monsters here... |
Interspersed through these scenes, there were a few other interesting catches I saw. First would be the homage to the Hoth Trooper uniform from Empire Strikes Back.

Elements of the First Order shuttle design before there was a Kylo Ren.
 |
| And boom goes the dynomite... |
 |
| Could also be a former Royal Guard since the fighting style is likely the same |
 |
| On top of the tank |
 | |
| We're here for your protection... |
 |
| Halo 3: ODST or Star Wars? |
Overall, I really liked this trailer and even after a couple weeks since it was revealed, I still find it very exciting. I feel like Rogue One has the possibility of becoming one massive hype-train though and could suffer from the both attempting to live up to "The Force Awakens" and also having a sufficient epic feeling meant to be told in one movie.
Rogue One has a very dubious distinction of being the first major Star Wars story that isn't considered an "episode #" in the Star Wars movie lexicon. It has to be a stand alone story without the benefit of another two movies to tell it's story. Honestly, I think this could be its biggest challenge.
Let me explain it this way. If you look back all of the Star Wars films, I contend that A New Hope is the only Star Wars film that can really be viewed alone without any of the other movies. Empire may be the best story in terms of acting/defining moments, but it is also the middle child in terms of the trilogy and really needs both A New Hope and Jedi to tell the complete story (as Empire really lacks the necessary character introductions). If you only viewed one Star Wars film, A New Hope really stands on its own without the rest of the saga.
Rogue One has to be a singular story and that may be a difficult accomplishment considering all of the other movies were written from the standpoint of either building on previous movies that built the universe or being able to tell a story that can be finished in another movie. Sure, Rogue One will tie into A New Hope, but unless they pull in other major connecting characters besides Mon Mothma, it can afford to be sufficiently detached from the main story. Rogue One can exist on its own SWU island, and I personally think it should.
So what do you think? Leave your comments below. Hope you liked the breakdown and reaction. I'd love to do more (perhaps a bit more brief in the future). Later sithspawn!
You can find part one of my breakdown here: Rogue One: Breakdown and Reaction pt 1
Please note, all images are screenshots from the Rogue One trailer found on Star Wars Official Youtube channel located here: https://www.youtube.com/user/starwars. Dropship Inbound is a non-profit blog and all images are protected under Fair Use. All rights reserved for the images of the trailer are Lucasfilm and Lucasfilm-affliates.
April 8, 2016
Trailer Breakdown & Reaction: Rogue One - A Star Wars Story Part 1
The newest teaser trailer of the new era of Star Wars films dropped yesterday and all geekdom rejoiced. The reason for all the joy? The fact that, love or hate, they had yet another Star Wars film to endlessly debate. Aside from Marvel, DC, and the Star Trek reboot, the renaissance of Star Wars has further solidified that Hollywood wants even more of that hard-earned geek-cash.
After the advent of The Force Awakens and the absolute box-office steamroller it was, we knew that we'd see additional side stories in the following years apart from the main Episodes VII, VIII, & IX. The first non-roman numeraled Star Wars film looks like it will come out swinging though and so I thought I'd take some time to breakdown the "teaser" trailer and cast some theories of my own into the argument. (Why this got the moniker "teaser" is beyond me. It's a friggin trailer.)
Overall, the information about Rogue One has been kept very "hush hush". Honestly, I think the CIA and NSA wishes they had this kind of security. Unlike a Clinton inbox though, the information that has been leaked has been very vague and high-level. We know that the story has to do with how Princess Leia received the plans for the original Death Star. Ostensibly, we can also assume that we'll see some kind of nods to what put Darth Vader onto Leia's trail at the beginning of A New Hope since all we've had until now is the first title scroll.

Alright, let's dive right in. Unlike the first Force Awakens teaser that was basically a heavy-breathing prank phone call followed by a series of flashy costumes and punctuated by Millennium Falcon pulling an Immelman, Rogue One's "teaser" has a lot more meat and a lot less creeper to it.
Immediately, we are introduced to the second strong female lead of the new era - Jyn Erso.
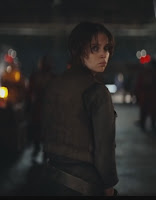 Of course, geekdom has exploded trying to figure out who she is much like if you've ever seen a girl walk into a miniature gaming store. As of now, there isn't a lot out there that clues us into who she is. On the surface, it looks like she's the typical scoundrel that the Rebellion seems to attract - most of whom look like they haven't showered in weeks. Still, I like the casting of Felicity Jones.
Before we go any farther though, gotta call out somebody...
Didn't think we see it, huh, Mr Guard? Sneaking a peek at the goods? Dirty old man...
Anyway, as the trailer continues, we are shown Jyn has been taken to the Rebel's main base of Yavin IV. Nice to see the old digs again.
The base looks fairly well established at this point in time and we see a T-65 X-Wing in the background. Costumes all fit the aesthetic established in the original film as well. Accompanying our entry into the base, though, was a voice-over listing off all of her crimes against the Empire. All of these are explained by this guy...
... and Mon Mothma! Surprise?! She gives a very motherly introduction to the main character of Jyn. Aside from it being pretty much rank-and-file for pretty much any scoundrel in the SWU, we can tell Jyn has been an outlaw, neither beholden to the Rebel's idealism nor the powerful Imperials. I'd count Mon Mothma as another plus for this movie. In terms of the original movies, she's a drastically underused character and the casting director did an amazing job getting an actress who is a dead-ringer for a slightly younger version of the venerated ex-Senator.
We also meet this handsome gent. Again, no identification or introduction, but I agree with some other sources that I think this could be maybe Poe Dameron's daddy. They look pretty similar and considering it looks like there might be a possible love-interest developed between himself and Jyn, it would give us one hell of a great origin to one of the new core characters.
The trailer continues on to show Jyn acting out her rage with a droid buddy of hers. Effectively, we find out despite her small stature, apparently she is some sort of elemental bad-ass. Not only is the vaunted "stormtrooper accuracy" in question, but I question their martial prowess. Dude, you just got beat up by a girl...
So after the soon-to-be iconic Jyn catchphrase is uttered ("I rebel..."), I loved Mon Mothma's smirk.
It's now we get to the money of the trailer. First we see the mission ahead of her. Of course, we already know this movie is about the stealing plans for the Death Star, but why not treat us to some new shots of the tragic monolith.
I will admit this is a great scene. Very awe-inspiring, but I'm not really a fan honestly. Considering the lore I grew up with have the central spine reactor, superstructure ribs, and the superlaser in place before the rest of the Death Star was built, the fact that we get treated to a scene where they insert a continent-sized focusing dish in place again looks cool, but it just doesn't jive for me.
That and this...
 Good looking Star Destroyer, except for what appears to be a giant drying rack or rabbit ears on top of the bridge? That or they worship the evil Chaos God Khorne...
Now we're greeted by the classic Imperial klaxon and a series of quick snapshots. On top of this we are introduced to who will likely be the foil of Mon Mothma's brilliant white outfit, Forest Whitaker's grizzled old character who is yet to be identified.
His character is a giant unknown to me, but I think I am safe in saying he's probably going to be the type of character who will help our team of protagonists, but also stab them in the back. His speech about how far Jyn will go sticks to a very common pragmatism that movies tend to use for those grey-area villian/anti-heroes that end up being the guy you should have shot much earlier in the film. Ya know, not before they effectively sacrificed your whole team for some Judas-like sum of money.
Stay tuned for part 2 of my breakdown of Rogue One. There's a whole lot more to cover, and that's best done in a second post. Overall, I am really looking forward to this movie, as you will see in my next post.
Until then, may the Force be with you.
You can find part 2 of my breakdown here: Rogue One: Breakdown and Reaction pt 2
Please note, all images are screenshots from the Rogue One trailer found on Star Wars Official Youtube channel located here: https://www.youtube.com/user/starwars. Dropship Inbound is a non-profit blog and all images are protected under Fair Use. All rights reserved for the images of the trailer are Lucasfilm and Lucasfilm-affliates.
After the advent of The Force Awakens and the absolute box-office steamroller it was, we knew that we'd see additional side stories in the following years apart from the main Episodes VII, VIII, & IX. The first non-roman numeraled Star Wars film looks like it will come out swinging though and so I thought I'd take some time to breakdown the "teaser" trailer and cast some theories of my own into the argument. (Why this got the moniker "teaser" is beyond me. It's a friggin trailer.)
Overall, the information about Rogue One has been kept very "hush hush". Honestly, I think the CIA and NSA wishes they had this kind of security. Unlike a Clinton inbox though, the information that has been leaked has been very vague and high-level. We know that the story has to do with how Princess Leia received the plans for the original Death Star. Ostensibly, we can also assume that we'll see some kind of nods to what put Darth Vader onto Leia's trail at the beginning of A New Hope since all we've had until now is the first title scroll.

Alright, let's dive right in. Unlike the first Force Awakens teaser that was basically a heavy-breathing prank phone call followed by a series of flashy costumes and punctuated by Millennium Falcon pulling an Immelman, Rogue One's "teaser" has a lot more meat and a lot less creeper to it.
Immediately, we are introduced to the second strong female lead of the new era - Jyn Erso.

Before we go any farther though, gotta call out somebody...
 |
| My eyes are up here buddy... |
Anyway, as the trailer continues, we are shown Jyn has been taken to the Rebel's main base of Yavin IV. Nice to see the old digs again.
 |
| Uh-oh, there's some Abrams lens-flare. It's sneaking in already... |
 |
| Get Netflix on that Holotank? |
 |
| I'm just gonna brood over here... |
The trailer continues on to show Jyn acting out her rage with a droid buddy of hers. Effectively, we find out despite her small stature, apparently she is some sort of elemental bad-ass. Not only is the vaunted "stormtrooper accuracy" in question, but I question their martial prowess. Dude, you just got beat up by a girl...
 |
| We introduce Jyn Erso-Bourne... |
 |
| And boom goes the thermal detonator! |
 |
| You go girl... |
 |
| DirecTV or Dish? |
That and this...

Now we're greeted by the classic Imperial klaxon and a series of quick snapshots. On top of this we are introduced to who will likely be the foil of Mon Mothma's brilliant white outfit, Forest Whitaker's grizzled old character who is yet to be identified.
 |
| Despite the limp, I wouldn't mess with him... |
Stay tuned for part 2 of my breakdown of Rogue One. There's a whole lot more to cover, and that's best done in a second post. Overall, I am really looking forward to this movie, as you will see in my next post.
Until then, may the Force be with you.
You can find part 2 of my breakdown here: Rogue One: Breakdown and Reaction pt 2
Please note, all images are screenshots from the Rogue One trailer found on Star Wars Official Youtube channel located here: https://www.youtube.com/user/starwars. Dropship Inbound is a non-profit blog and all images are protected under Fair Use. All rights reserved for the images of the trailer are Lucasfilm and Lucasfilm-affliates.
Subscribe to:
Posts (Atom)